Showing posts sorted by relevance for query tutorial. Sort by date Show all posts

Monday, February 9, 2009

I got an Award!! Woo Hoo!

I don't know if you all have heard of this site, if not, you have to check it out!!! it is WWW.CRAFTSTER.ORG!
Melesa intoduced me to it and since then it has become one of my faves.

I recently got an award for my "Bleach Stencil Tutorial" which I also posted here on my blog.


Congrats!! Craftster Best of 2008!


Yay! Best of 2008!


Everyone can check out my Tutorial here: http://www.craftster.org/forum/index.php?topic=278418.0


Also, take some time to check out the site. It has some AMAZING ideas. It is all posts from people like you and me of all things crafty.


Enjoy!

Monday, November 10, 2008

Bleach Stencil Tutorial

Here it is! I'm really excited about this post. I've recieved many requests for a "bleach stencil"tutorial. I finally got it all together. These shirts are so easy and they look great! The best part is that you can turn a plain, inexpensive t-shirt into a customized creation. For any of you that try this out, I want to see your creations too!

Be creative! There are no limits on what you can do!


Materials needed:

T-shirt

Freezer paper

Craft knife

Iron and Ironing board

Spray bottle

Bleach and water


Step 1: Print out your stencil onto Freezer Paper (Cut a 8.5 x 11 piece of paper to put in the printer and make sure the stencil prints on the non-plastic side of the paper.)


Step 2. Cut out the design with the craft knife. hint: cut on the plastic side of the paper for easier, more precise cutting.
Usually I will cut out and discard the black parts of the stencil and keep the white. (It is hard to distiguish the black and white on the owl in these pictures).

Don't forget to keep the small pieces (e.g. the eyes or the middle of the O's)


Now the hard part is over! Now for the fun stuff.


Step 3: Place the t-shirt on the ironing board and place the stencil on the shirt making sure it is centered. Run a moderately cool iron over the freezer paper so that the paper sticks to the shirt.


This is the miracle of freezer paper! Isn't it great!?!

I do the biggest pieces first and then put on the smaller ones.


Step 4: While the shirt is still on the ironing board, place a piece of cardboard inside. This is to protect the bleach from soaking to the back side of the shirt. This also helps to keep the stencil from coming up when you move the shirt.

I used the back of a cereal box. It is just the right size.


Step 5: Place the shirt on a table or counter (wherever you have enough room). Place newspaper around the stencil to catch the over spray.


Step 6: Mix your bleach water.
I use 2 parts water to 1 part bleach. The best spray bottles for this project are these little ones you can get at Wal-Mart or Target. They are very small fingertip spray bottles. They have a very fine mist which evenly distributes the bleach water and prevents splotches. Hair spray bottles will also work, but they don't always have a fine spray.


Step 7: Spray!
Spray just enough to make the shirt damp. If you spray too much it will soak into the fabric and smudge your beautiful, crisp lines.
(I also used rocks to hold down my newspaper. )


Step 8: Let the bleach dry and spray again. Keep doing this until you get the desired lightness. I was lucky on this one, it only took me 2 sprays and it was white. Usually it takes me from 3 to 5 times to get it just right.

Step 9: Almost done. When the shirt is dry, remove the stencil and rinse in HOT water. This will stop the bleaching process. I also scrub a little soap into the stenciled area to remove any leftover bleach.
Step 10: Wash and wear.
Wash as usual and enjoy your new one-of-a-kind wearable art!

Tuesday, March 22, 2011

We interrupt this challenge for an update.

We have been up to some fun stuff lately so I wanted to share a little.


I got my hands on a wheat grinder and learned how to make homemade fresh ground wheat for bread! I think I'm in love.

And we canned some yummy blackberry jam. To go with the homemade bread, of course.

 And while I've been working inside the house our weeds have been growing like. . . weeds. So me and the boys attacked the garden and said goodbye to the weeds! They were such good helpers and wow did they get dirty. I wish I would have snapped some "after" pictures.
 Some of the weeds were almost as tall as the boys. We had to dig about 18 inches underground to pull out all of the Bermuda grass roots. It was gruelling work for 2 little boys and a 7 months pregnant me but we got it done! Woo!

Me and da boys went to Greenfield park for the first time in about a year. It was all brand new to them.
Ryan showed off by climbing up the monkey bars!


Simon makes a good monkey too.

I snapped some shots of a new T-shirt I made for Ryan. I posted a tutorial on my Cantaloupe Corner blog if you want to make one too!


 Funny Simon. He got a new t-shirt too. Since he is such a train fanatic, we made him a Trainiac T-shirt. He wore it two days in a row. I had to hide it on the third day so he wouldn't wear it again. :)
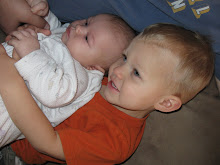
 I sure love this kid!

And this one too! I love that the duck looks like it was colored with a sharpie. lol. 

The boys favorite part of the park was the "shaky shaky bridge". Ryan was so scared of the moving bridge at first but once he built up his courage we couldn't get him off of it! He found his new favorite playground game, running across the shaky shaky bridge.


What else have we been up to?

Simon is still loving preschool and we are currently trying to pick the "perfect" kindergarten for him. I can't believe he is that big already! It is bitter sweet. He has been working hard on his letters and numbers and can easily count to 100 now! He is also getting to be a good reader. He read me "Hop on Pop" last night. I'm such a proud mommy.

Ryan is as mischievous and fun as ever. We get to spend some time together while Simon is at preschool. He goes shopping with me or we will spend time reading books or coloring pictures. He has just discovered Simon's markers. No matter where I put them he finds them and he colors some part of himself, or his clothes, everyday.
His favorite color is orange and he insists that he wears and orange shirt everyday! We have even picked up some orange plaid shorts and orange sandals to match all of his orange shirts.

Our little Mason will be here in about 2 months. May 30th is the due date. We are hoping I can be induced early since our other boys were so big. The earliest the doctor will induce will be May 23rd.
Mason still doesn't have a middle name. I'm sure we won't pick it until the last minute because right now every time we start talking names we start throwing out random middle names like "Danger".

The boys are getting excited for their baby brother to arrive. Simon loves to feel him kick and Ryan is finally starting to understand that he gets to be a big brother soon.

I'm still running Cantaloupe Corner for a little while longer. My shop has been doing well and I am really enjoying it! But. . . pretty soon I have to close it down for a while. boo hoo. But I have more important motherly duties to attend to and I am sooooo excited to meet our sweet little boy. Being a mom is the best thing in the entire world!

Jeremiah is still working the daily grind at Farnsworth Wholesale. We love getting to spend some quality time with him on the weekends and he has been working hard trying to get our yard, and his sister's, back into shape.

That's all that's going on around here. We are having fun, staying busy, and enjoying life!

Monday, October 13, 2008

Stencil Obsession

Bleach stencilling is my new obsession.
These are my most recent creations. I love that I can buy a shirt for like 3 bucks and turn it into a personalized, one-of-a-kind creation. The best part about it is that Simon loves his new shirts! I call this an obsession because this morning I pulled a sweater out of Simon's closet for him to wear and it was just a plain ol' gray sweater. The first thing I said was, "We can't just leave that plain, we have to put something on it." I'm working on a couple more that I will post here when I'm done.


This is Simon's Halloween Shirt. The color turned out just how I wanted it! It looks more orange in real life. I
Next time I post shirts I will do a tutorial to go with it so everyone can make cool shirts!


Si and Ry

Si and Ry